Underwater Photography Tips for Coral Reefs
Choosing the Right Camera Settings for Underwater Photography
Understanding Light and Color Underwater
Light behaves very differently underwater compared to on land. It loses intensity quickly and takes on a blue-green hue, which can make photos look dull if not adjusted properly. To capture vibrant colors, you’ll need to tweak your camera’s white balance and exposure settings. This adjustment compensates for the unique lighting conditions underwater. Trial and error is often the best way to find the perfect settings for your specific dive environment.
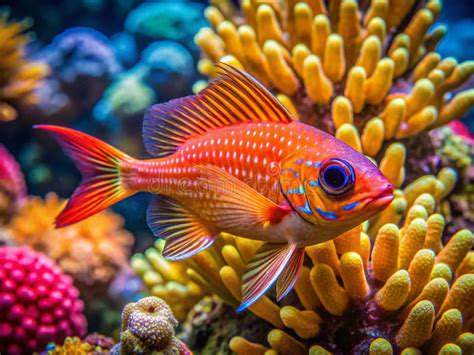
The way light interacts with water also affects how colors appear in your shots. Reds and oranges vanish first as you go deeper, leaving a blue or green tint. Knowing this helps you correct colors later, whether you’re editing on a computer or using in-camera tools. Mastering this will make your photos look more natural and visually striking.
Optimizing Aperture for Depth of Field
Aperture settings control how much of your photo is in focus. A wide aperture (like f/2.8) blurs the background, which works well for close-ups of sea creatures or divers. On the other hand, a narrow aperture (like f/16) keeps more of the scene sharp, ideal for expansive reef shots. Your choice depends on whether you want to highlight a single subject or capture the whole underwater landscape.
Distance plays a big role too. If your subject is far from the background, a wide aperture can create beautiful bokeh. But for busy scenes with lots of fish and coral, a smaller aperture ensures everything stays crisp. Practice is key—experiment with different settings to see what works best.
Adjusting Shutter Speed for Motion Blur
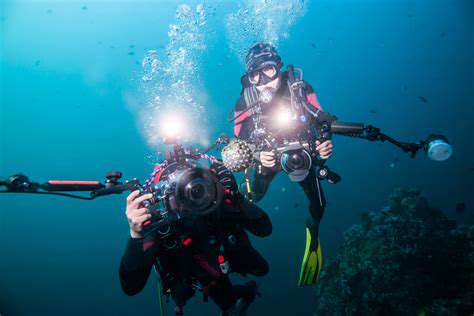
Shutter speed determines how motion appears in your photos. Fast-moving fish or divers require a quick shutter (1/250 sec or faster) to freeze the action. Slower speeds (1/60 sec or below) can convey movement artistically but may introduce blur if not handled carefully. Underwater, even slight currents can affect stability, so a faster shutter is often safer.
Choosing the Correct ISO Setting
ISO adjusts your camera’s sensitivity to light. In dim underwater environments, you might need to raise the ISO (e.g., 400 or higher) to get a proper exposure. However, higher ISOs can introduce grain or noise. The trick is to use the lowest ISO possible while still keeping the image well-exposed. Balancing ISO with aperture and shutter speed is crucial for clean, bright photos.
Using Underwater Housing and Filters
A sturdy housing is non-negotiable—it protects your camera from water and pressure. Filters can also be game-changers, correcting color shifts and reducing glare. Polarizing filters cut reflections, while color-correction filters bring back lost vibrancy. Investing in quality gear ensures your photos look their best, even in challenging conditions.
Composition Techniques for Stunning Underwater Shots
Great photos aren’t just about settings—composition matters too. Use the rule of thirds, leading lines, and symmetry to create dynamic images. Look for interesting textures and play with light and shadow. Changing your angle can transform an ordinary shot into something extraordinary. A low perspective, for example, can make small creatures look more imposing.
Post-Processing Tips for Enhancing Your Underwater Photos
Pre-Processing Considerations
Before editing, pre-processing starts in the water. Capturing well-exposed, focused shots in RAW format gives you more flexibility later. Proper white balance and exposure in-camera reduce the need for heavy edits. High-end gear also helps, as sharper originals lead to better final results.
Color Correction and Enhancement
Underwater photos often need color fixes due to the blue/green cast. Boosting saturation and adjusting white balance can restore vibrancy. Tools like curves and color balance let you fine-tune individual hues for a natural look. Avoid overdoing it—subtle adjustments usually work best.
Removing Artifacts and Noise
Backscatter (floating particles) and noise are common issues. Use spot healing or noise reduction tools sparingly to clean up images without losing detail. Over-editing can make photos look artificial, so tread lightly.
Sharpening and Detail Enhancement
Sharpening brings out details but can create harsh edges if overused. Apply it selectively, focusing on key areas like a fish’s scales or coral textures. A light touch keeps the image looking natural.
Adjusting Lighting and Contrast
Underwater lighting is often uneven. Use curves or levels to brighten shadows and tame highlights. Balancing light and contrast makes photos more visually appealing.
Composition and Cropping
Cropping can improve composition by removing distractions or emphasizing subjects. Follow classic rules like the rule of thirds, but don’t be afraid to experiment. A well-composed shot needs less editing to shine.
Final Touches and Export
Before exporting, do a final pass for sharpening, noise, and color. Save files in the right format and resolution for their intended use (web, print, etc.). This ensures your hard work looks its best wherever it’s displayed.
Read more about Underwater Photography Tips for Coral Reefs


![Exploring Medieval Castles in Europe [Historical Tour]](/static/images/27/2025-06/AJourneyThroughTime3AFamousCastlesandTheirStories.jpg)


![Guide to Visa Requirements for US Citizens Traveling to [Country]](/static/images/27/2025-06/ContactingtheAppropriateAuthorities.jpg)